
- Home
- Products Category
- Knee
- 5755 ROM HINGED KNEE STABILIZER 13"
 Collar
 Shoulder
 Wrist
Wrist Elbow
Elbow Abdomen
 Back
Back Hip
Hip Knee
Knee Ankle
Ankle Foot
Foot
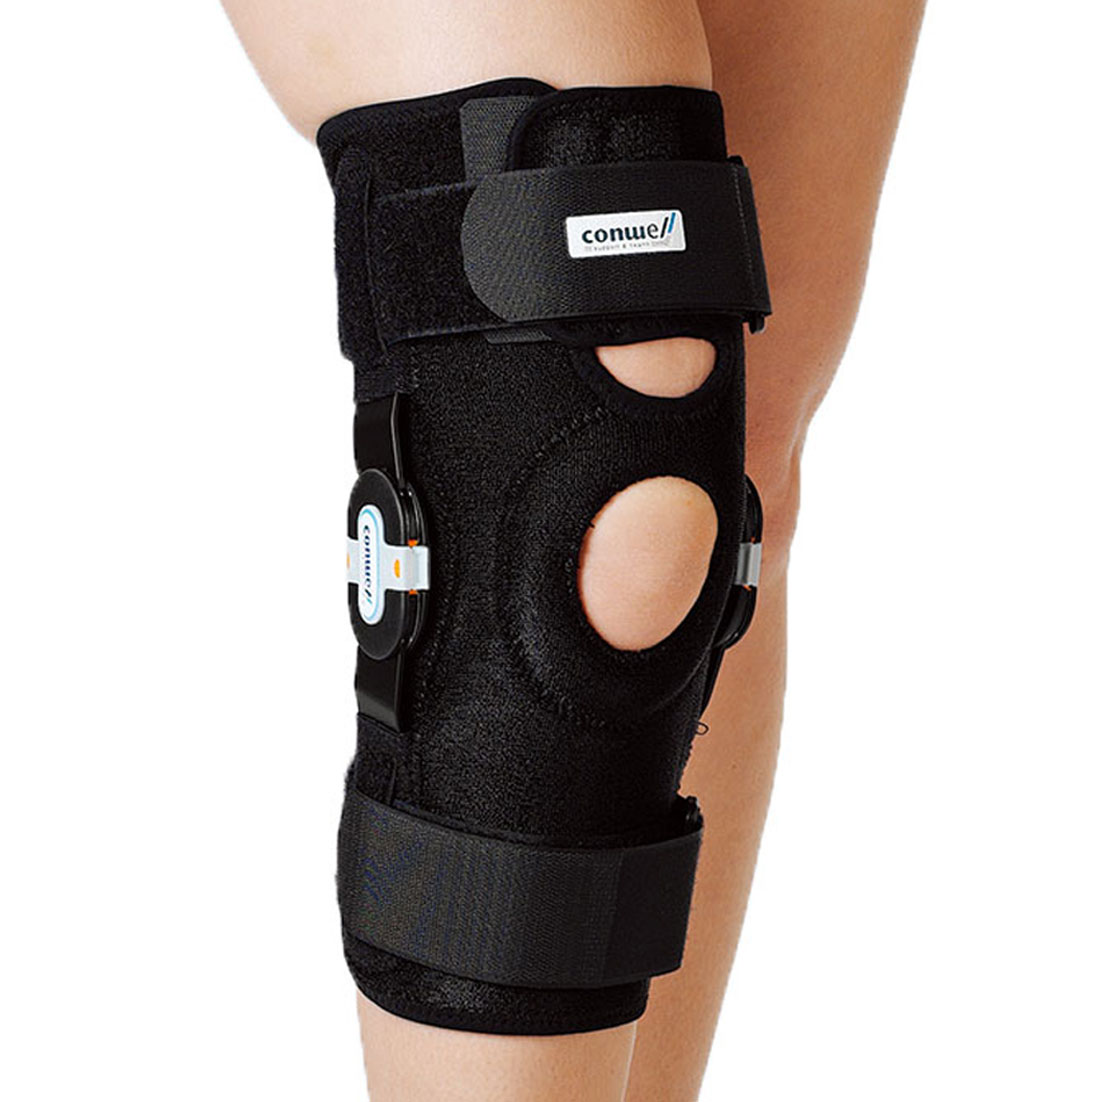
5755 ROM HINGED KNEE STABILIZER 13"
Indications
■ Patella stabilization■ Improve knee joint function
■ Improve knee stability
■ Protect cruciate and collateral ligaments

Features
■ COOLMAX® fabric lining keeps you cool and comfortable.■ Patented ROM hinge allows easy and fast range of motion setting, tool-free.
■ Extension limit of 0°-90° and flexion limit of 0°-105°.
Size:S . M . L . XL . XXL
| SIZE | Knee Circumference ( Measurements are taken 6”(15cm) above mid-patella ) |
| S | 13 inch - 15 inch 33 cm - 38 cm |
| M | 15 inch - 17 inch 38 cm - 43 cm |
| L | 17 inch - 19 inch 43 cm - 48 cm |
| XL | 19 inch - 21 inch 48 cm - 53 cm |
| XXL | 21 inch - 23 inch 53 cm - 58 cm |
COOLMAX® fabric Line ROM HINGED KNEE STABILIZER is designed to protect ligaments and improve knee joint function.
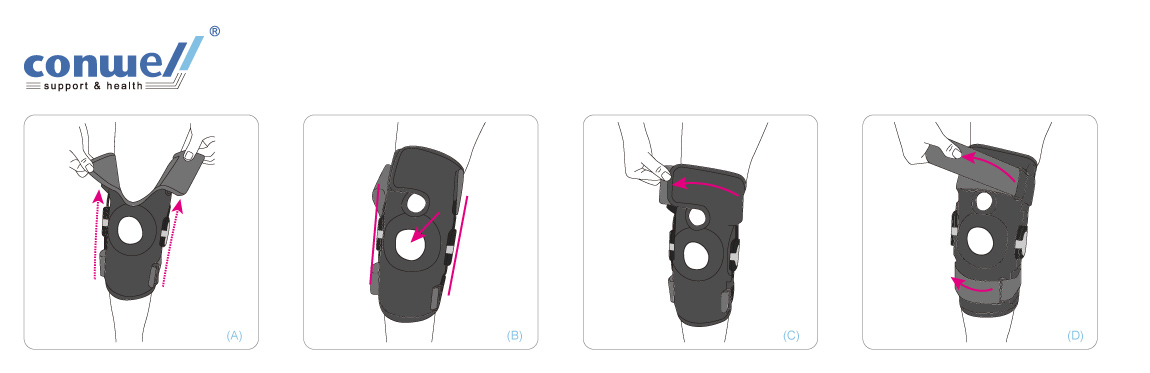
❶ Unfasten all the hook and loop fasteners. Slide the knee stabilizer over foot, and pull the knee stabilizer up to the leg and over the knee (Fig. A).
❷ Center patella opening on the kneecap and make sure the hinges are positioned on both sides of the kneecap (Fig. B).
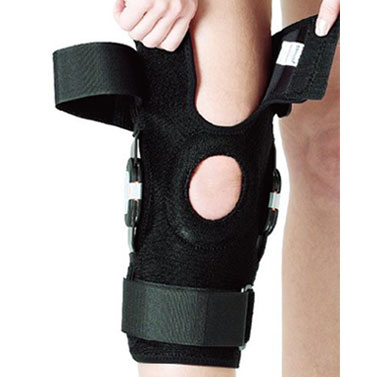
❸ Fasten the hoop and loop fastener on the brace and adjust it to desired tightness (Fig. C).
❹ Secure the upper and lower straps, thread through the buckles and secure the hook and loop closures until desired level of support is achieved (Fig. D).
ROM setting instruction:
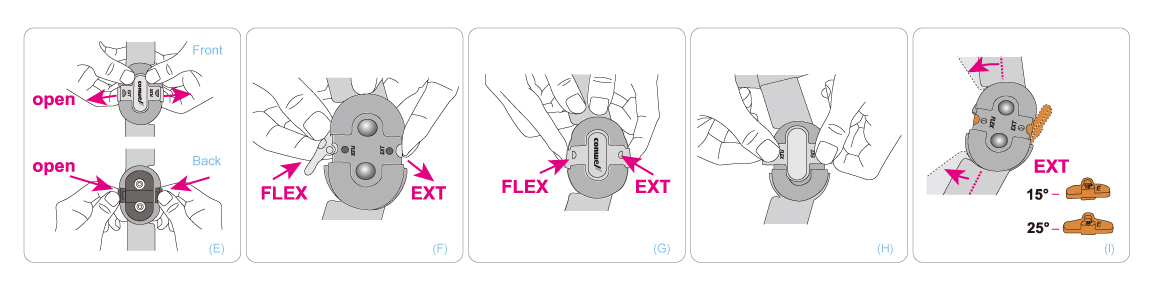
❺For ROM ( range of motion ) setting, take off the Flexion / Extension stops fix cap by gently unlocking the cap from the bottom using the fingers(Fig. E).
❻Select the correct Flexion and Extension stops, place them into the notches according to the FLEX/EXT marks on the hinge,“F” stops in“FLEX” notch, “E”stops in “EXT” notch. For easier application, place the shorter Flexion / Extension stop before the longer Flexion / Extension stop. Take out the longer stop before the shorter one(Fig. F).
❼Re-place the Flexion / Extension stops fix cap (Fig. G)., place the cap on the hinge accordingly to FLEX / EXT marks. Make sure the bolts on the cap are well fixed to the holes, then have the ends of the cap well locked to the hinge (Fig. H).
❽There are two extension buffer stops with 15°and 25°. Those extra buffer stops are designed to help relieve pain and discomfort by slowing down knee extension movement and avoid knee shock feel near full knee extension. Bigger extension range buffer stop (25°) or smaller extension range buffer stop (15°) can be selected according to individual requirement(Fig. I).
Caution:
1.If discomfort or pain results, persists or increases, discontinue use and consult a physician.
2.Usage as directed by physician, also operated by professional accroding to physician indication.Do not operate without consulting physician.
3.Make sure the hook and loop fasteners are well fastened while wearing the product. If the hook and loop fasteners cannot be fastened well. stop using the product to prevent injuries.
Washing Instructions:
1. Remove foam liner from hinges for hand wash. using a mild detergent and cold water. air dry. Do not wash in washing machine or place in mechanical dryer. Do not bleach nor iron.
2. The splints are removable, please remove the splints before washing.